When a customer returns a faulty item to your company, usually he or she will request for a replacement. In this case, the replacement could be lesser in value. Another example will be over payment for certain invoices. In BMO Inventory Management System, a credit note has to be issued to record this accordingly for audit purposes and how much credit has been credited into customer’s online inventory management system.
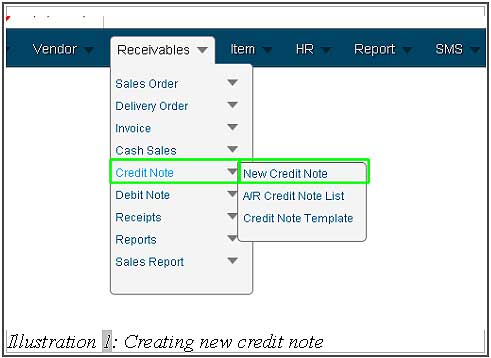
You can create a new credit note in Online Inventory Management System by using following steps as shown as below.
1. Click on the “New Credit Note” (Receivables > Credit Note > New Credit Note) on the navigation menu bar.
Please click on image to view clearer.
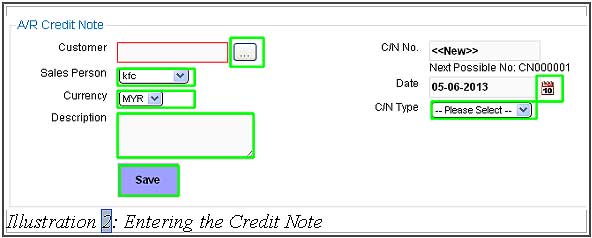
2. Fill in the “A/R Credit Note” by selecting “Customer” and click on “…” button to browse for your customers. Next, choose your “Sales Person”. Then, choose your preferred “Currency”. “Description” is optional for user. For more accurate results, you can select “Date” by clicking the Calendar icon to select date to issues. Lastly, select the “C/N Type”
Please click on image to view clearer.
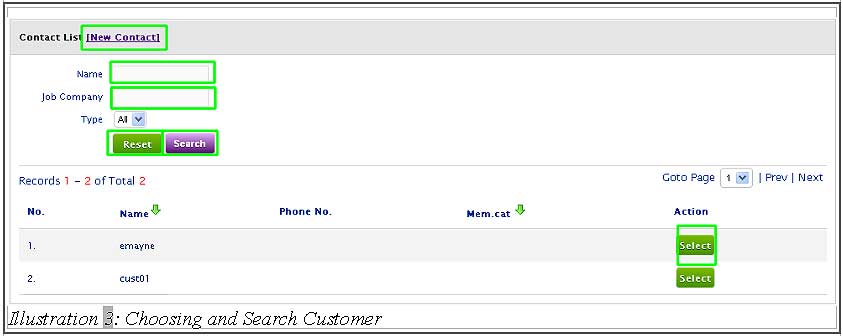
3. After clicking on icon “Customer” “…” button, the window below will appear. There is a list of customers inside the window. You can search the customer’s contact by typing their “Name” and “Job Company”.
Otherwise, choose “New Contact” to create a new one. If you are able to find the customer in the list, click “Select button.
Please click on image to view clearer.
4. Add a “Debit Account” by clicking on “Add Line” button. Click on the “Magnifier icon” to browse for the debit account. The “description” is optional. In addition to that, the “currency” and “rate” will be filled in automatically. Next, you can choose an “amount for the debit account. Lastly, to delete off the account, just click on the “X” icon.
Please click on image to view clearer.

5. On the “Item List”, you have to click “…” button to browse for the item in the list. As you choose the item, you have to know the Quantity of item involved. To delete the selected item in the list, just click the “X” icon.
Please click on image to view clearer.

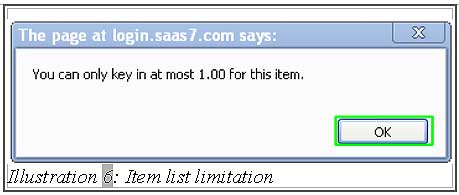
6. If you keyed in the “Quantity” wrongly, an error message will appear as below. Re-insert the quantity in the “Quantity” field and click on “OK” to dismiss the message.
Please click on image to view clearer.
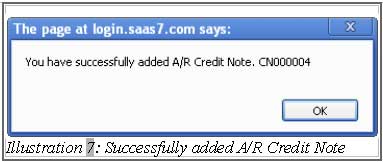
7. After you have complete filling in the fields, click on “Save” and a message will appear to notify you that the credit note is successfully added. Click on OK button to dismiss the message. Your credit note will appear in the credit note list.
To check how to view the credit note list, click HERE.

